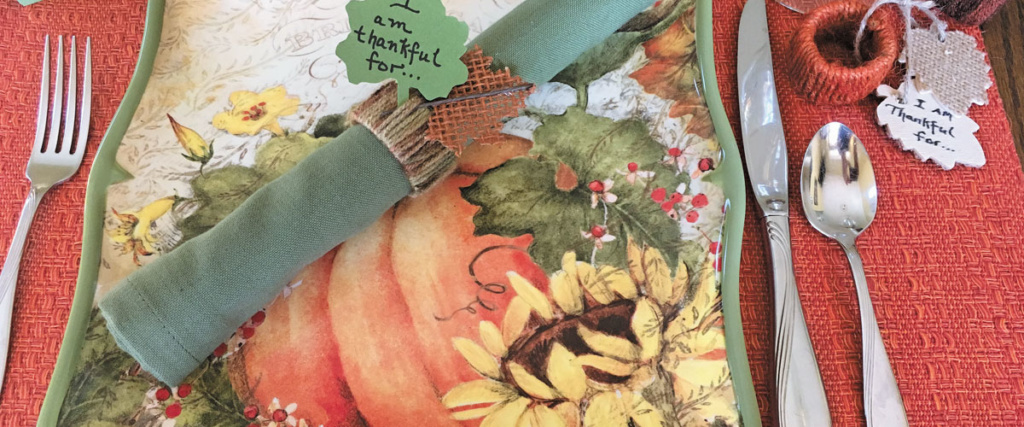
November sees restless children sandwiched between the sugar rush of Halloween and the anticipation of Christmas. Keep them busy with a simple but engaging craft that will have them focused on contributing to the big dinner and what it means to be thankful.
Purchase or recycle. The items I bought were from Hobby Lobby, but AC Moore and Michaels carry the same types of supplies. The rolls we used were recycled from home but more durable versions can be purchased. Save a little more money by asking relatives who knit or crochet for leftover yarn.
Online prices for napkin holder rings vary from a few dollars to $20; they usually come in a set of six. My purchases cost about $12, and that cost could easily cover 20 rings with the pictures or more than 100 without the accessory.
Make the cut. This craft can be done by children as young as preschool age with help or older kids with less guidance. Supervise or help your child cut the paper towel rolls into half-inch wide or 1-inch circles, depending on your preference. Wider rings will be sturdier but will use more yarn. This will bend the cardboard but no worries—just reform it back into shape.
Each half-inch napkin ring will take roughly six feet (about 72 inches) of yarn or string. No measuring tape? No problem. An easy way to calculate is to stretch your arms out to the sides. Your height is from middle finger to middle finger. I’m 5-foot-5 so I pull out enough for the span from finger to finger and add another foot or two to my yarn before cutting. Knowing the number of guests for dinner will determine how much yarn will be needed. I purchase a skein of yarn so we won’t run out. Keep in mind small packages of string or ribbon might only yield about four completed rings. Measure and cut the yarn.
Get loopy. Tie a knot with the loose end onto the ring and snip the excess. Turn the tie so it’s inside and hidden. Have your child loop the yarn over the ring firmly and pull the excess through. Secure each pass with a thumb so it won’t bunch up. If the yarn is not close to the loop ahead of it, simply push the yarn with your finger to line it up. Repeat until the whole ring is covered, leaving enough yarn to knot it off.
I chose an ombre style of yarn because it incorporated all the colors of autumn. If combinations of different colored yarns are used, or if the measured yard is too short, just tie off the ends, snip the excess and tuck before starting again. For a small child, each ring will take about 10 minutes to cover.
Make the finishing touches. There are many different things to use for decorative labels: a fall theme with pumpkins, or turkeys and pilgrims, for instance. Our small craft decorations—or “pics”—were burlap and wooden “leaves,” so we could use them for the whole season. We included heavy colored paper for an inscription with the burlap tags, and were able to write directly on the wooden ones. Whatever you choose, find a way to include “I am thankful for. . . ” on or with them. Add these decorative pieces to the napkin rings so they will be visible. If a glue gun is used, keep in mind a little dab of glue will go a long way. And, as always, please supervise or assist kids to avoid accidents or burns!
What’s the message? Not only will these crafts become an addition to the yearly festivities, they will also become a topic of conversation at the dinner table. While the children get acknowledged for their art, encourage them to ask family members what they are thankful for. It’s a good time for kids to remember there is more to life than tech gadgets and toys. (That perspective might also be helpful for adults.)
Doing this craft with my children was fun and relaxing. It can be a break from the fast-paced holiday season. When seasonal yarns and decorations go on sale, I might just buy more to have napkin ring holder sets for other holidays, too.


